Building a Single Vue App with Nx
In this tutorial you'll learn how to use Vue with Nx in a "standalone" (non-monorepo) setup. Not to be confused with the "Vue Standalone API", a standalone project in Nx is a non-monorepo setup where you have a single application at the root level.
What will you learn?
- how to add Nx to a Vue project
- how to run a single task (i.e. serve your app) or run multiple tasks in parallel
- how to leverage code generators to scaffold components
- how to modularize your codebase and impose architectural constraints for better maintainability
- how to speed up CI with Nx Cloud ⚡
We'll start out this tutorial using Nx together with a Vue application generated with the default npm create vue command. Later, we'll add the @nx/vue plugin to show the nice enhancements that it can provide. Visit our "Why Nx" page to learn more about plugins and what role they play in the Nx architecture.
Final Code
Here's the source code of the final result for this tutorial.
Example repository/nrwl/nx-recipes/tree/main/vue-app
Creating a new Vue App
Create a new Vue application with the following command:
~❯
npm create vue vue-app -- --ts --jsx --router --vitest --playwright --eslint-with-prettier
1
2Vue.js - The Progressive JavaScript Framework
3
4Scaffolding project in ~/vue-app...
5
6Done. Now run:
7
8  cd vue-app
9  npm install
10  npm run format
11  npm run dev
12
Once you have run npm install, set up Git with the following commands:
❯
git init
❯
git add .
❯
git commit -m "initial commit"
This command sets up a Vue app that uses Typescript and is configured to use the Vue router, Vitest for unit tests, Playwright for e2e tests and ESLint and Prettier for formatting. Your repository should now have the following structure:
1└─ vue-app
2   ├─ .vscode
3   │  └─ extensions.json
4   ├─ e2e
5   │  ├─ tsconfig.json
6   │  └─ vue.spec.ts
7   ├─ public
8   ├─ src
9   │  ├─ assets
10   │  ├─ components
11   │  ├─ router
12   │  ├─ views
13   │  ├─ App.vue
14   │  └─ main.ts
15   ├─ .eslintrc.cjs
16   ├─ .prettierrc.json
17   ├─ index.html
18   ├─ package.json
19   ├─ playwright.config.ts
20   ├─ README.md
21   ├─ tsconfig.app.json
22   ├─ tsconfig.json
23   ├─ tsconfig.node.json
24   ├─ tsconfig.vitest.json
25   ├─ vite.config.ts
26   └─ vitest.config.ts
27
The setup includes..
- a new Vue application at the root of the Nx workspace (
src) - a Playwright based set of e2e tests (
e2e/) - Prettier preconfigured
- ESLint preconfigured
- Vitest preconfigured
You can build the application with the following command:
1npm run build
2
Add Nx
Nx offers many features, but at its core, it is a task runner. Out of the box, it can:
- cache your tasks
- ensure those tasks are run in the correct order
After the initial set up, you can incrementally add on other features that would be helpful in your organization.
To enable Nx in your repository, run a single command:
~/vue-app❯
npx nx@latest init
This command will download the latest version of Nx and help set up your repository to take advantage of it.
First, the script will propose installing some plugins based on the packages that are being used in your repository.
- Leave the plugins deselected so that we can explore what Nx provides without any plugins.
Second, the script asks a series of questions to help set up caching for you.
Which scripts are cacheable?- Choosetest:e2e,build-only,type-checkandlintDoes the "test:e2e" script create any outputs?- Enterplaywright-reportDoes the "build-only" script create any outputs?- EnterdistDoes the "type-check" script create any outputs?- Enter nothingDoes the "lint" script create any outputs?- Enter nothingWould you like remote caching to make your build faster?- ChooseSkip for now.
We'll enable Nx Cloud and add remote caching later in the tutorial.
Caching Pre-configured
Nx has been configured to run your npm scripts as Nx tasks. You can run a single task like this:
~/vue-app❯
npx nx type-check vue-app
During the init script, Nx also configured caching for these tasks. You can see in the nx.json file that the scripts we identified as cacheable have the cache property set to true and the build-only target specifies that its output goes to the project's dist folder.
1{
2  "$schema": "./node_modules/nx/schemas/nx-schema.json",
3  "targetDefaults": {
4    "test:e2e": {
5      "outputs": ["{projectRoot}/playwright-report"],
6      "cache": true
7    },
8    "build-only": {
9      "outputs": ["{projectRoot}/dist"],
10      "cache": true
11    },
12    "type-check": {
13      "cache": true
14    },
15    "lint": {
16      "cache": true
17    }
18  },
19  "defaultBase": "main"
20}
21
Try running type-check for the vue-app app a second time:
~/vue-app❯
npx nx type-check vue-app
The first time nx type-check was run, it took about 2 seconds - just like running npm run type-check. But the second time you run nx type-check, it completes instantly and displays this message:
1Nx read the output from the cache instead of running the command for 1 out of 1 tasks.
2
You can see the same caching behavior working when you run npx nx lint.
Create a Task Pipeline
If you look at the build script in package.json, you'll notice that it is actually doing two things. It runs the type-check script and, in parallel, runs the build-only script.
1{
2  "scripts": {
3    "build": "run-p type-check \"build-only {@}\" --",
4    "build-only": "vite build",
5    "type-check": "vue-tsc --build --force"
6  }
7}
8
Instead of deciding ahead of time whether tasks need to be run in parallel or series, let's define the dependencies between tasks and then allow Nx to run them in the most efficient way possible. Update the package.json file with the following information:
1{
2  "scripts": {
3    "build": "nx exec -- echo 'Ran type-check and build-only'",
4    "build-only": "vite build",
5    "type-check": "vue-tsc --build --force"
6  }
7}
8
Since the build command itself doesn't do anything, we can replace it with an echo to the console. The dependencies between the tasks we can define in the dependsOn property in the nx.json file:
1{
2  "targetDefaults": {
3    "build": {
4      "dependsOn": ["type-check", "build-only"]
5    }
6  }
7}
8
Whenever Nx runs the build task, it knows that the type-check and build-only tasks need to be run first. However, if the build script is run without using Nx (say with npm run build), the task dependencies will not be run. That's why we add the nx exec -- command at the beginning of the build script in package.json. If you run npm run build, Nx will be used to run the task and any dependencies will be invoked correctly.
Now if you run nx build vue-app, Nx will run type-check and build-only first.
There's still one piece of functionality that was lost by this change. The {@} syntax in the original build script was used to forward command line arguments to the build-only script. To accomplish the same thing with Nx, instead of using a string for the build-only task dependency, we'll use an object and tell Nx to forward arguments on to that task.
1{
2  "targetDefaults": {
3    "build": {
4      "dependsOn": [
5        "type-check",
6        {
7          "target": "build-only",
8          "params": "forward"
9        }
10      ]
11    }
12  }
13}
14
If you run nx build vue-app -l=error, Nx will run the build-only script with a log level of error.
~/vue-app❯
npx nx build
1> nx run vue-app:type-check  [existing outputs match the cache, left as is]
2
3
4> vue-app@0.0.0 type-check
5> vue-tsc --build --force
6
7
8> nx run vue-app:build-only  [local cache]
9
10
11> vue-app@0.0.0 build-only
12> vite build -l error
13
14
15> nx run vue-app:build -l error
16
17
18> vue-app@0.0.0 build
19> nx exec -- echo 'Ran type-check and build-only' -l error
20
21Ran type-check and build-only -l error
22
23—————————————————————————————————————————————————————————————————————
24
25 NX   Successfully ran target build for project vue-app and 2 tasks it depends on (456ms)
26
27      With additional flags:
28        --l=error
29
And once again, running npx nx build or npm run build twice will complete instantly.
Use Nx Plugins to Enhance Vite Tasks with Caching
You may remember that we defined the outputs property in nx.json when we were answering questions in the nx init script. The value is currently hard-coded so that if you change the output path in your vite.config.ts, you have to remember to also change the outputs array in the build task configuration. This is where plugins can help. Plugins enable better integration with specific tools. The @nx/vite plugin can understand the vite.config.ts file and automatically create and configure tasks based on the settings in that file.
Nx plugins can:
- automatically configure caching for you, including inputs and outputs based on the underlying tooling configuration
- create tasks for a project using the tooling configuration files
- provide code generators to help scaffold out projects
- automatically keep the tooling versions and configuration files up to date
For this tutorial, we'll just focus on the automatic caching configuration.
First, let's delete the outputs array for the build-only task in nx.json so that we don't override the inferred values from the plugin. Your nx.json should look like this:
1{
2  "$schema": "./node_modules/nx/schemas/nx-schema.json",
3  "targetDefaults": {
4    "test:e2e": {
5      "outputs": ["{projectRoot}/playwright-report"],
6      "cache": true
7    },
8    "build": {
9      "dependsOn": [
10        "type-check",
11        {
12          "target": "build-only",
13          "params": "forward"
14        }
15      ]
16    },
17    "build-only": {
18      "cache": true
19    },
20    "type-check": {
21      "cache": true
22    },
23    "lint": {
24      "cache": true
25    }
26  },
27  "defaultBase": "main"
28}
29
Now let's add the @nx/vite plugin:
~/vue-app❯
npx nx add @nx/vite
1✔ Installing /vite...
2✔ Initializing /vite...
3
4 NX Package /vite added successfully.
5The nx add command installs the version of the plugin that matches your repo's Nx version and runs that plugin's initialization script. For @nx/vite, the initialization script registers the plugin in the plugins array of nx.json and updates any package.json scripts that execute Vite related tasks. Open the project details view for the vue-app app and look at the vite:build task.
~/vue-app❯
npx nx show project vue-app
If you hover over the settings for the vite:build task, you can see where those settings come from. The inputs and outputs are defined by the @nx/vite plugin from the vite.config.ts file where as the dependsOn property we set earlier in the tutorial is set in the targetDefaults in the nx.json file.
Now let's change where the vite:build results are output to in the vite.config.ts file.
1import { fileURLToPath, URL } from 'node:url'
2
3import { defineConfig } from 'vite'
4import vue from '@vitejs/plugin-vue'
5import vueJsx from '@vitejs/plugin-vue-jsx'
6
7// https://vitejs.dev/config/
8export default defineConfig({
9  plugins: [vue(), vueJsx()],
10  build: {
11    outDir: 'dist/vue-app'
12  },
13  resolve: {
14    alias: {
15      '@': fileURLToPath(new URL('./src', import.meta.url))
16    }
17  }
18})
19
Now if you look at project details view again, you'll see that the outputs property for Nx's caching has been updated to stay in sync with the setting in the vite.config.ts file.
You can also add the @nx/eslint plugin to see how it infers lint tasks based on the ESLint configuration files.
1npx nx add @nx/eslint
2
Creating New Components
You can just create new Vue components as you normally would. However, Nx plugins also ship generators. They allow you to easily scaffold code, configuration or entire projects. Let's add the @nx/vue plugin to take advantage of the generators it provides.
1npx nx add @nx/vue
2
To see what capabilities the @nx/vue plugin ships, run the following command and inspect the output:
~/vue-app❯
npx nx list @nx/vue
1
2NX   Capabilities in @nx/vue:
3
4   GENERATORS
5
6   init : Initialize the `@nx/vue` plugin.
7   application : Create a Vue application.
8   library : Create a Vue library.
9   component : Create a Vue component.
10   setup-tailwind : Set up Tailwind configuration for a project.
11   storybook-configuration : Set up storybook for a Vue app or library.
12   stories : Create stories for all components declared in an app or library.
13If you prefer a more integrated experience, you can install the "Nx Console" extension for your code editor. It has support for VSCode, IntelliJ and ships a LSP for Vim. Nx Console provides autocompletion support in Nx configuration files and has UIs for browsing and running generators.
More info can be found in the editor setup page.
Run the following command to generate a new "BaseButton" component. Note how we append --dry-run to first check the output.
~/vue-app❯
npx nx g @nx/vue:component src/components/BaseButton --no-export --skipTests --dry-run
1 NX  Generating @nx/vue:component
2
3✔ Where should the component be generated? · src/components/BaseButton.vue
4CREATE src/components/BaseButton.vue
5
6NOTE: The "dryRun" flag means no changes were made.
7
As you can see it generates a new component in the src/components/ folder. If you want to actually run the generator, remove the --dry-run flag.
1<script setup lang="ts">
2// defineProps<{}>()
3</script>
4
5<template>
6  <p>Welcome to BaseButton!</p>
7</template>
8
9<style scoped></style>
10
You're ready to go!
In the previous sections you learned about the basics of using Nx, running tasks and navigating an Nx workspace. You're ready to ship features now!
But there's more to learn. You have two possibilities here:
- Jump to the next steps section to find where to go from here or
- keep reading and learn some more about what makes Nx unique when working with Vue.
Modularize your Vue App with Local Libraries
When you develop your Vue application, usually all your logic sits in the src folder. Ideally separated by various folder names which represent your "domains". As your app grows, this becomes more and more monolithic though.
1└─ vue-app
2   ├─ ...
3   ├─ src
4   │  ├─ views
5   │  │  ├─ products
6   │  │  └─ cart
7   │  ├─ components
8   │  │  ├─ ui
9   │  │  └─ ...
10   │  ├─ App.vue
11   │  └─ main.ts
12   ├─ ...
13   ├─ package.json
14   ├─ ...
15
Nx allows you to separate this logic into "local libraries". The main benefits include
- better separation of concerns
- better reusability
- more explicit "APIs" between your "domain areas"
- better scalability in CI by enabling independent test/lint/build commands for each library
- better scalability in your teams by allowing different teams to work on separate libraries
Create a Local Library
Let's assume our domain areas include products, orders and some more generic design system components, called ui. We can generate a new library for these areas using the Vue library generator:
1nx g @nx/vue:library modules/products --unitTestRunner=vitest --bundler=vite --component
2
Note how we use the --directory flag to place the library into a subfolder. You can choose whatever folder structure you like to organize your libraries.
Nx tries to set up your workspace to work with the modular library architecture, but depending on your existing configuration, you may need to tweak some settings. In this repo, you'll need to do a few things in order to prepare for future steps.
Lint Settings
We want the lint task for the root vue-app project to only lint the files for that project, so we'll change the lint command in package.json:
1{
2  "scripts": {
3    "lint": "eslint src --ext .vue,.js,.jsx,.cjs,.mjs,.ts,.tsx,.cts,.mts --fix --ignore-path .gitignore"
4  }
5}
6
Now we need to update the .eslintrc.cjs file to extend the .eslintrc.base.json file:
1/* eslint-env node */
2require('@rushstack/eslint-patch/modern-module-resolution');
3
4module.exports = {
5  root: true,
6  extends: [
7    'plugin:vue/vue3-essential',
8    'eslint:recommended',
9    '@vue/eslint-config-typescript',
10    '@vue/eslint-config-prettier/skip-formatting',
11    './.eslintrc.base.json',
12  ],
13  ignorePatterns: ['!**/*'],
14  overrides: [
15    {
16      files: ['e2e/**/*.{test,spec}.{js,ts,jsx,tsx}'],
17      extends: ['plugin:playwright/recommended'],
18    },
19  ],
20  parserOptions: {
21    ecmaVersion: 'latest',
22  },
23};
24
Build Settings
To make sure that the build can correctly pull in code from libraries, we need to move the typescript paths from the tsconfig.app.json file to the newly created tsconfig.base.json and extend that base file.
1{
2  "extends": ["@vue/tsconfig/tsconfig.dom.json", "./tsconfig.base.json"],
3  "include": ["env.d.ts", "src/**/*", "src/**/*.vue"],
4  "exclude": ["src/**/__tests__/*"]
5}
61{
2 "extends": "./tsconfig.app.json",
3 "exclude": [],
4 "compilerOptions": {
5 "lib": [],
6 "types": ["node", "jsdom"]
7 }
8}
91{
2 "compileOnSave": false,
3 "compilerOptions": {
4 "baseUrl": ".",
5 "paths": {
6 "@/*": ["./src/*"],
7 "products": ["modules/products/src/index.ts"]
8 }
9 }
10}
11We also need to update vite.config.ts to account for typescript aliases. Run the following generator to automatically update your configuration file.
❯
npx nx g @nx/vite:setup-paths-plugin
This will update the vite.config.ts file to include the nxViteTsPaths plugin in the plugins array.
1import { fileURLToPath, URL } from 'node:url';
2
3import { defineConfig } from 'vite';
4import vue from '@vitejs/plugin-vue';
5import vueJsx from '@vitejs/plugin-vue-jsx';
6import { nxViteTsPaths } from '@nx/vite/plugins/nx-tsconfig-paths.plugin';
7
8// https://vitejs.dev/config/
9export default defineConfig({
10  plugins: [vue(), vueJsx(), nxViteTsPaths()],
11  build: {
12    outDir: 'dist/vue-app',
13  },
14  resolve: {
15    alias: {
16      '@': fileURLToPath(new URL('./src', import.meta.url)),
17    },
18  },
19});
20
Create More Libraries
Now that the repository is set up, let's generate the orders and ui libraries.
1nx g @nx/vue:library modules/orders --unitTestRunner=vitest --bundler=vite --component
2nx g @nx/vue:library modules/ui --unitTestRunner=vitest --bundler=vite --component
3
Running the above commands should lead to the following directory structure:
1└─ vue-app
2   ├─ ...
3   ├─ e2e/
4   ├─ modules
5   │  ├─ products
6   │  │  ├─ .eslintrc.json
7   │  │  ├─ README.md
8   │  │  ├─ vite.config.ts
9   │  │  ├─ package.json
10   │  │  ├─ project.json
11   │  │  ├─ src
12   │  │  │  ├─ index.ts
13   │  │  │  └─ lib
14   │  │  │     ├─ products.spec.ts
15   │  │  │     └─ products.vue
16   │  │  ├─ tsconfig.json
17   │  │  ├─ tsconfig.lib.json
18   │  │  ├─ tsconfig.spec.json
19   │  │  └─ vite.config.ts
20   │  ├─ orders
21   │  │  ├─ ...
22   │  │  ├─ project.json
23   │  │  ├─ src
24   │  │  │  ├─ index.ts
25   │  │  │  └─ ...
26   │  │  └─ ...
27   │  └─ shared
28   │     └─ ui
29   │        ├─ ...
30   │        ├─ project.json
31   │        ├─ src
32   │        │  ├─ index.ts
33   │        │  └─ ...
34   │        └─ ...
35   ├─ src
36   │  ├─ components
37   │  ├─ ...
38   │  ├─ App.vue
39   │  └─ main.tsx
40   ├─ ...
41
Each of these libraries
- has a project details view where you can see the available tasks (e.g. running tests for just orders:
nx test orders) - has its own
project.jsonfile where you can customize targets - has a dedicated
index.tsfile which is the "public API" of the library - is mapped in the
tsconfig.base.jsonat the root of the workspace
Importing Libraries into the Vue Application
All libraries that we generate automatically have aliases created in the root-level tsconfig.base.json.
1{
2  "compilerOptions": {
3    ...
4    "paths": {
5      "@/*": ["./src/*"],
6      "orders": ["modules/orders/src/index.ts"],
7      "products": ["modules/products/src/index.ts"],
8      "ui": ["modules/shared/ui/src/index.ts"]
9    },
10    ...
11  },
12}
13
That way we can easily import them into other libraries and our Vue application. As an example, let's import the Products component from the products project into our main application. First, configure the router in the src/router/index.ts.
1import { createRouter, createWebHistory } from 'vue-router';
2import HomeView from '../views/HomeView.vue';
3
4const router = createRouter({
5  history: createWebHistory(import.meta.env.BASE_URL),
6  routes: [
7    {
8      path: '/',
9      name: 'home',
10      component: HomeView,
11    },
12    {
13      path: '/about',
14      name: 'about',
15      // route level code-splitting
16      // this generates a separate chunk (About.[hash].js) for this route
17      // which is lazy-loaded when the route is visited.
18      component: () => import('../views/AboutView.vue'),
19    },
20    {
21      path: '/products',
22      name: 'products',
23      component: () => import('products').then((m) => m.Products),
24    },
25    {
26      path: '/orders',
27      name: 'orders',
28      component: () => import('orders').then((m) => m.Orders),
29    },
30  ],
31});
32
33export default router;
34
Then we can add links to the routes in App.vue.
1<script setup lang="ts">
2import { RouterLink, RouterView } from 'vue-router'
3import HelloWorld from './components/HelloWorld.vue'
4</script>
5
6<template>
7 <header>
8 <img alt="Vue logo" class="logo" src="@/assets/logo.svg" width="125" height="125" />
9
10 <div class="wrapper">
11 <HelloWorld msg="You did it!" />
12
13 <nav>
14 <RouterLink to="/">Home</RouterLink>
15 <RouterLink to="/about">About</RouterLink>
16 <RouterLink to="/products">Products</RouterLink>
17 <RouterLink to="/orders">Orders</RouterLink>
18 </nav>
19 </div>
20 </header>
21
22 <RouterView />
23</template>
24
25...
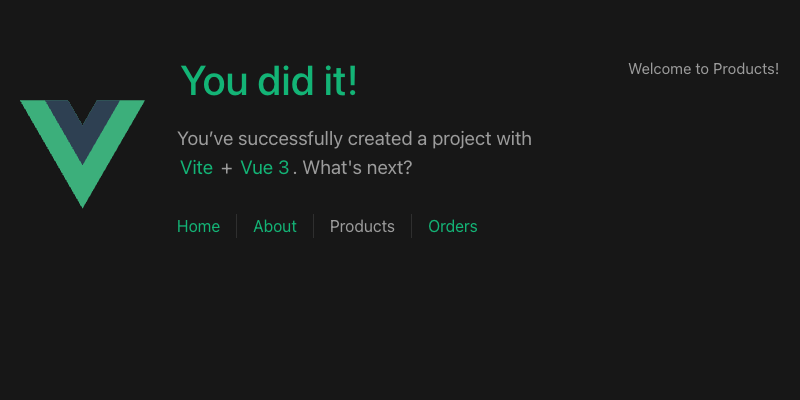
26Serving your app (nx serve) and then navigating to /products should give you the following result:
Visualizing your Project Structure
Nx automatically detects the dependencies between the various parts of your workspace and builds a project graph. This graph is used by Nx to perform various optimizations such as determining the correct order of execution when running tasks like nx build, identifying affected projects and more. Interestingly you can also visualize it.
Just run:
❯
nx graph
You should be able to see something similar to the following in your browser (hint: click the "Show all projects" button).
Notice how ui is not yet connected to anything because we didn't import it in any of our projects. Also the arrows to orders and products are dashed because we're using lazy imports.
Exercise for you: change the codebase so that ui is used by orders and products.
Imposing Constraints with Module Boundary Rules
Once you modularize your codebase you want to make sure that the modules are not coupled to each other in an uncontrolled way. Here are some examples of how we might want to guard our small demo workspace:
- we might want to allow
ordersto import fromshared-uibut not the other way around - we might want to allow
ordersto import fromproductsbut not the other way around - we might want to allow all libraries to import the
shared-uicomponents, but not the other way around
When building these kinds of constraints you usually have two dimensions:
- type of project: what is the type of your library. Example: "feature" library, "utility" library, "data-access" library, "ui" library (see library types)
- scope (domain) of the project: what domain area is covered by the project. Example: "orders", "products", "shared" ... this really depends on the type of product you're developing
Nx comes with a generic mechanism that allows you to assign "tags" to projects. "tags" are arbitrary strings you can assign to a project that can be used later when defining boundaries between projects. For example, go to the project.json of your orders library and assign the tags type:feature and scope:orders to it.
1{
2  ...
3  "tags": ["type:feature", "scope:orders"],
4  ...
5}
6
Then go to the project.json of your products library and assign the tags type:feature and scope:products to it.
1{
2  ...
3  "tags": ["type:feature", "scope:products"],
4  ...
5}
6
Finally, go to the project.json of the shared-ui library and assign the tags type:ui and scope:shared to it.
1{
2  ...
3  "tags": ["type:ui", "scope:shared"],
4  ...
5}
6
Notice how we assign scope:shared to our UI library because it is intended to be used throughout the workspace.
Next, let's come up with a set of rules based on these tags:
type:featureshould be able to import fromtype:featureandtype:uitype:uishould only be able to import fromtype:uiscope:ordersshould be able to import fromscope:orders,scope:sharedandscope:productsscope:productsshould be able to import fromscope:productsandscope:shared
To enforce the rules, Nx ships with a custom ESLint rule.
Lint Settings
We want the lint task for the root react-app project to only lint the files for that project (in the src folder), so we'll change the lint command in package.json:
1{
2  "scripts": {
3    "lint": "eslint src --ext .vue,.js,.jsx,.cjs,.mjs,.ts,.tsx,.cts,.mts --fix --ignore-path .gitignore"
4  }
5}
6
We need to update the .eslintrc.cjs file to extend the .eslintrc.base.json file and undo the ignorePattern from that config that ignores every file. The .eslintrc.base.json file serves as a common set of lint rules for every project in the repository.
1/* eslint-env node */
2require('@rushstack/eslint-patch/modern-module-resolution');
3
4module.exports = {
5  root: true,
6  extends: [
7    'plugin:vue/vue3-essential',
8    'eslint:recommended',
9    '@vue/eslint-config-typescript',
10    '@vue/eslint-config-prettier/skip-formatting',
11    './.eslintrc.base.json',
12  ],
13  ignorePatterns: ['!**/*'],
14  overrides: [
15    {
16      files: ['e2e/**/*.{test,spec}.{js,ts,jsx,tsx}'],
17      extends: ['plugin:playwright/recommended'],
18    },
19  ],
20  parserOptions: {
21    ecmaVersion: 'latest',
22  },
23};
24
Now we need to update the .eslintrc.base.json file and define the depConstraints in the @nx/enforce-module-boundaries rule:
1{
2  "overrides": [
3    {
4      "files": ["*.ts", "*.tsx", "*.js", "*.jsx"],
5      "rules": {
6        "@nx/enforce-module-boundaries": [
7          "error",
8          {
9            "enforceBuildableLibDependency": true,
10            "allow": [],
11            "depConstraints": [
12              {
13                "sourceTag": "*",
14                "onlyDependOnLibsWithTags": ["*"]
15              },
16              {
17                "sourceTag": "type:feature",
18                "onlyDependOnLibsWithTags": ["type:feature", "type:ui"]
19              },
20              {
21                "sourceTag": "type:ui",
22                "onlyDependOnLibsWithTags": ["type:ui"]
23              },
24              {
25                "sourceTag": "scope:orders",
26                "onlyDependOnLibsWithTags": [
27                  "scope:orders",
28                  "scope:products",
29                  "scope:shared"
30                ]
31              },
32              {
33                "sourceTag": "scope:products",
34                "onlyDependOnLibsWithTags": ["scope:products", "scope:shared"]
35              },
36              {
37                "sourceTag": "scope:shared",
38                "onlyDependOnLibsWithTags": ["scope:shared"]
39              }
40            ]
41          }
42        ]
43      }
44    }
45    ...
46  ]
47}
48
When Nx set up the @nx/eslint plugin, it chose a task name that would not conflict with the pre-existing lint script. Let's overwrite that name so that all the linting tasks use the same lint name. Update the setting in the nx.json file:
1{
2  ...
3  "plugins": [
4    {
5      "plugin": "@nx/eslint/plugin",
6      "options": {
7        "targetName": "lint"
8      }
9    }
10  ]
11}
12
Test Boundary Rules
To test the boundary rules, go to your modules/products/src/lib/products.tsx file and import the Orders from the orders project:
To test it, go to your modules/products/src/lib/products.vue file and import the Orders component from the orders project:
1<script setup lang="ts">
2defineProps<{}>();
3
4// 👇 this import is not allowed
5import { Orders } from 'orders';
6</script>
7
8<template>
9  <p>Welcome to Products!</p>
10</template>
11
12<style scoped></style>
13
If you lint your workspace you'll get an error now:
❯
nx run-many -t lint
1   ✔  nx run ui:lint  [existing outputs match the cache, left as is]
2   ✔  nx run orders:lint  [existing outputs match the cache, left as is]
3
4——————————————————————————————————————————————————————————————————————————————————————————————————————————————————————————————————————————————
5   ✖  nx run products:lint
6      > eslint .
7
8      ~/vue-app/modules/products/src/lib/products.vue
9        5:1  error  A project tagged with "scope:products" can only depend on libs tagged with "scope:products", "scope:shared"  @nx/enforce-module-boundaries
10
11      ✖ 1 problem (1 error, 0 warnings)
12
13   ✔  nx run vue-app:lint (892ms)
14   ✔  nx run vue-app:lint (1s)
15
16——————————————————————————————————————————————————————————————————————————————————————————————————————————————————————————————————————————————
17
18 NX   Ran targets lint for 4 projects (1s)
19
20   ✔  4/5 succeeded [2 read from cache]
21
22   ✖  1/5 targets failed, including the following:
23
24      - nx run products:lint
25
Learn more about how to enforce module boundaries.
Migrating to a Monorepo
When you are ready to add another application to the repo, you'll probably want to move myvueapp to its own folder. To do this, you can run the convert-to-monorepo generator or manually move the configuration files.
Fast CI ⚡
Make sure you have completed the previous sections of this tutorial before starting this one. If you want a clean starting point, you can check out the reference code as a starting point.
This tutorial walked you through how Nx can improve the local development experience, but the biggest difference Nx makes is in CI. As repositories get bigger, making sure that the CI is fast, reliable and maintainable can get very challenging. Nx provides a solution.
- Nx reduces wasted time in CI with the
affectedcommand. - Nx Replay's remote caching will reuse task artifacts from different CI executions making sure you will never run the same computation twice.
- Nx Agents efficiently distribute tasks across machines ensuring constant CI time regardless of the repository size. The right number of machines is allocated for each PR to ensure good performance without wasting compute.
- Nx Atomizer automatically splits large e2e tests to distribute them across machines. Nx can also automatically identify and rerun flaky e2e tests.
Connect to Nx Cloud
Nx Cloud is a companion app for your CI system that provides remote caching, task distribution, e2e tests deflaking, better DX and more.
Now that we're working on the CI pipeline, it is important for your changes to be pushed to a GitHub repository.
- Commit your existing changes with
git add . && git commit -am "updates" - Create a new GitHub repository
- Follow GitHub's instructions to push your existing code to the repository
Now connect your repository to Nx Cloud with the following command:
❯
npx nx connect
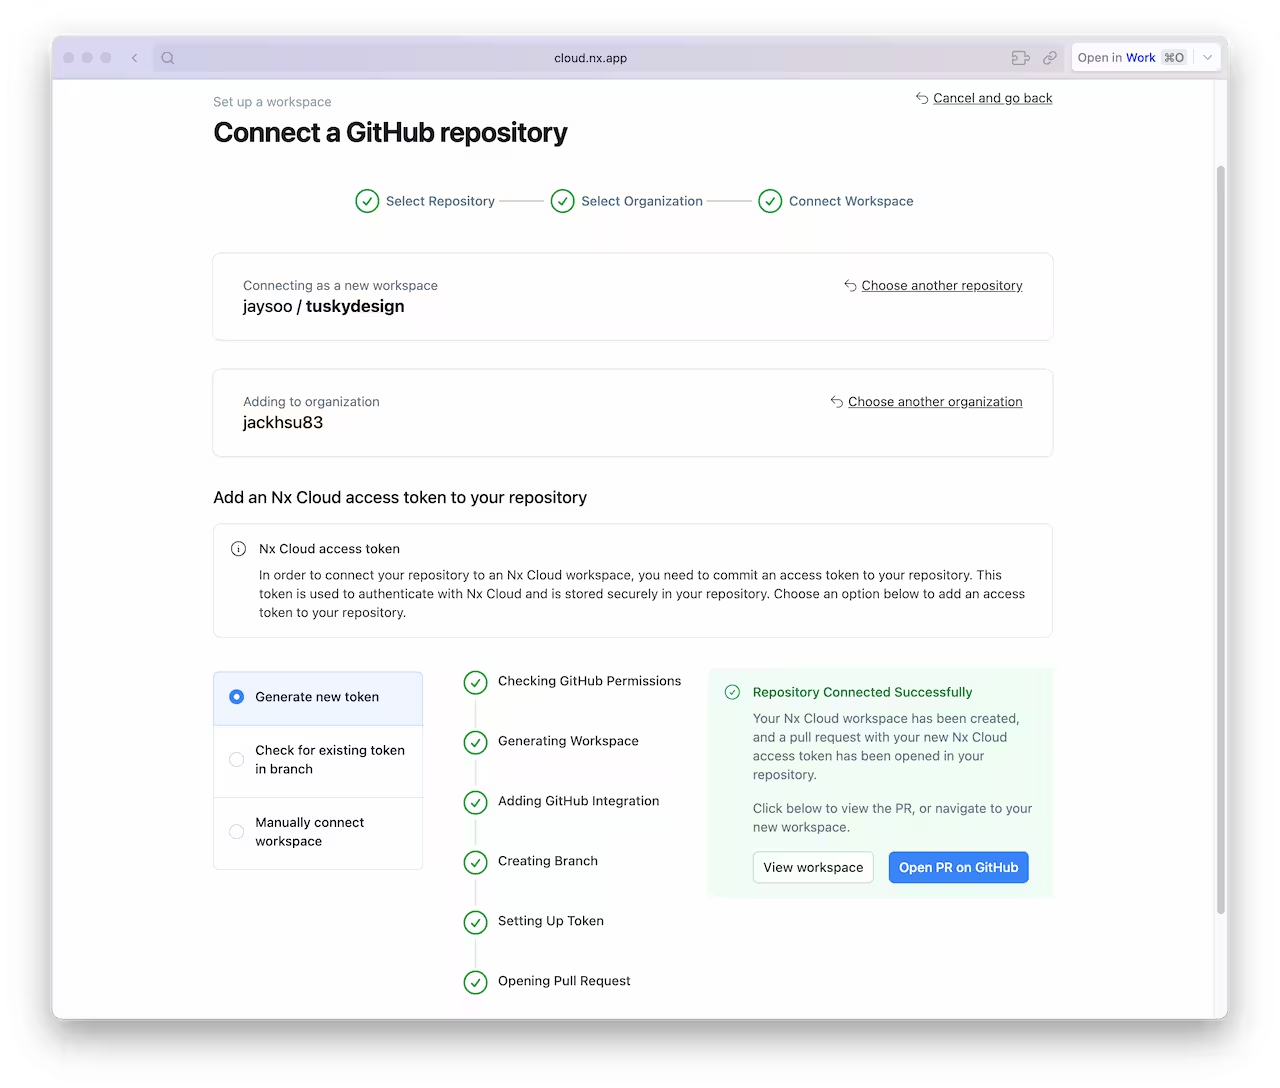
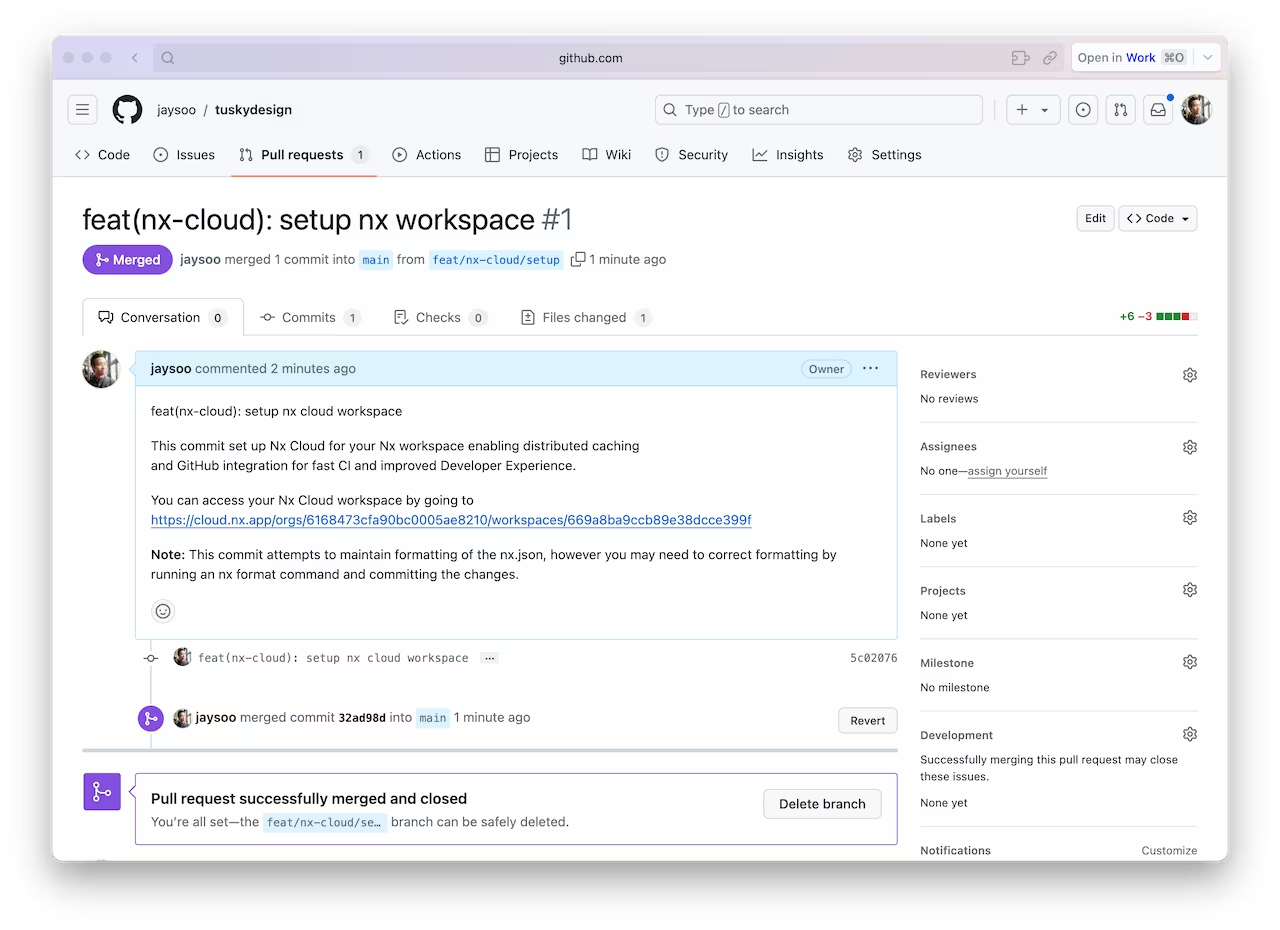
A browser window will open to register your repository in your Nx Cloud account. The link is also printed to the terminal if the windows does not open, or you closed it before finishing the steps. The app will guide you to create a PR to enable Nx Cloud on your repository.
Once the PR is created, merge it into your main branch.
And make sure you pull the latest changes locally:
❯
git pull
You should now have an nxCloudId property specified in the nx.json file.
Create a CI Workflow
Use the following command to generate a CI workflow file.
❯
npx nx generate ci-workflow --ci=github
This generator creates a .github/workflows/ci.yml file that contains a CI pipeline that will run the lint, test, build and e2e tasks for projects that are affected by any given PR. Since we are using Nx Cloud, the pipeline will also distribute tasks across multiple machines to ensure fast and reliable CI runs.
The key lines in the CI pipeline are:
1name: CI
2# ...
3jobs:
4  main:
5    runs-on: ubuntu-latest
6    steps:
7      - uses: actions/checkout@v4
8        with:
9          fetch-depth: 0
10      # This enables task distribution via Nx Cloud
11      # Run this command as early as possible, before dependencies are installed
12      # Learn more at https://nx.dev/ci/reference/nx-cloud-cli#npx-nxcloud-startcirun
13      # Connect your workspace by running "nx connect" and uncomment this
14      - run: npx nx-cloud start-ci-run --distribute-on="3 linux-medium-js" --stop-agents-after="build"
15      - uses: actions/setup-node@v3
16        with:
17          node-version: 20
18          cache: 'npm'
19      - run: npm ci --legacy-peer-deps
20      - uses: nrwl/nx-set-shas@v4
21      # Nx Affected runs only tasks affected by the changes in this PR/commit. Learn more: https://nx.dev/ci/features/affected
22      - run: npx nx affected -t lint test build
23
Open a Pull Request
Commit the changes and open a new PR on GitHub.
❯
git add .
❯
git commit -m 'add CI workflow file'
❯
git push origin add-workflow
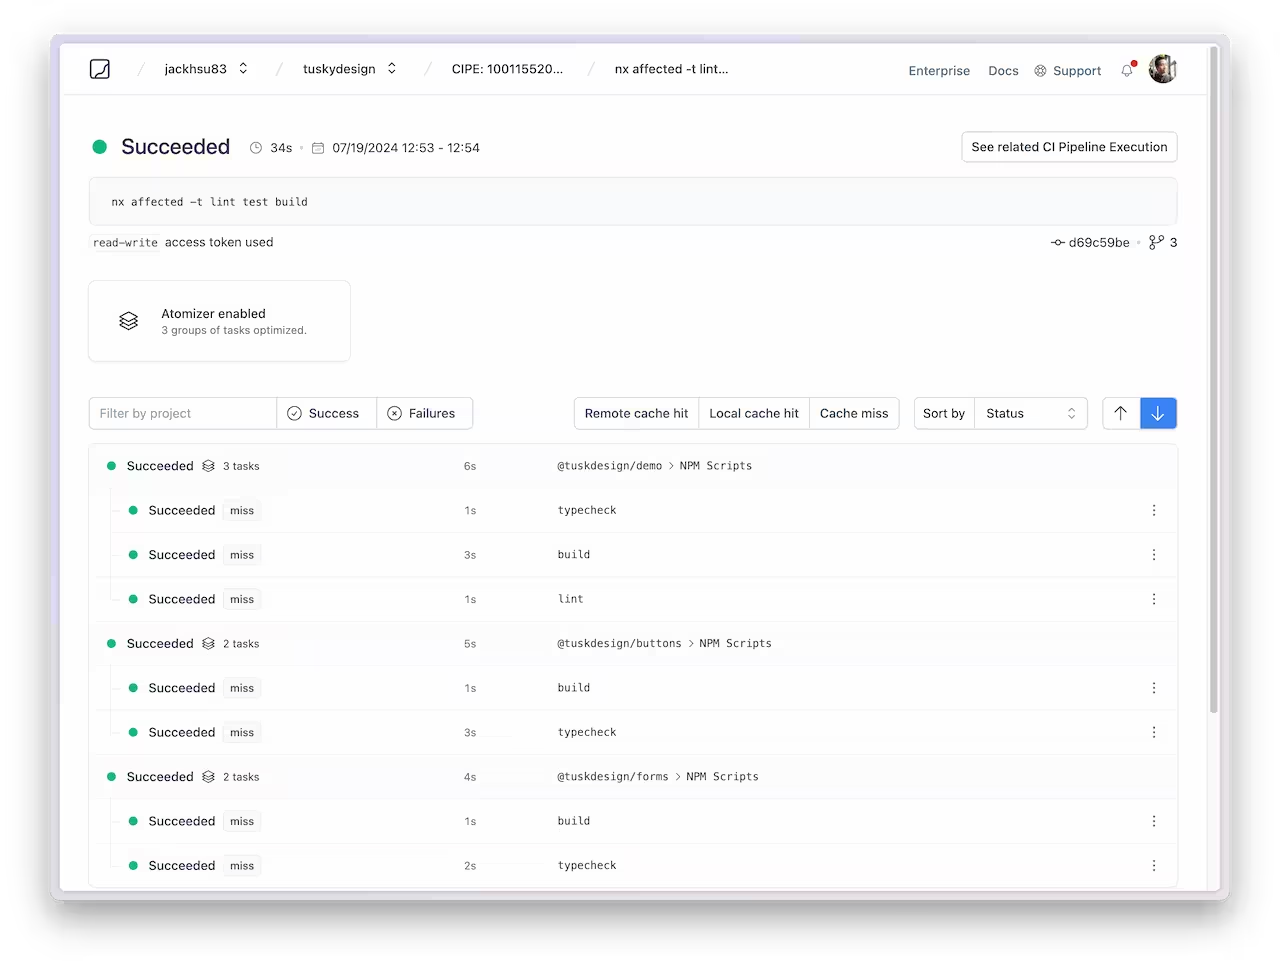
When you view the PR on GitHub, you will see a comment from Nx Cloud that reports on the status of the CI run.
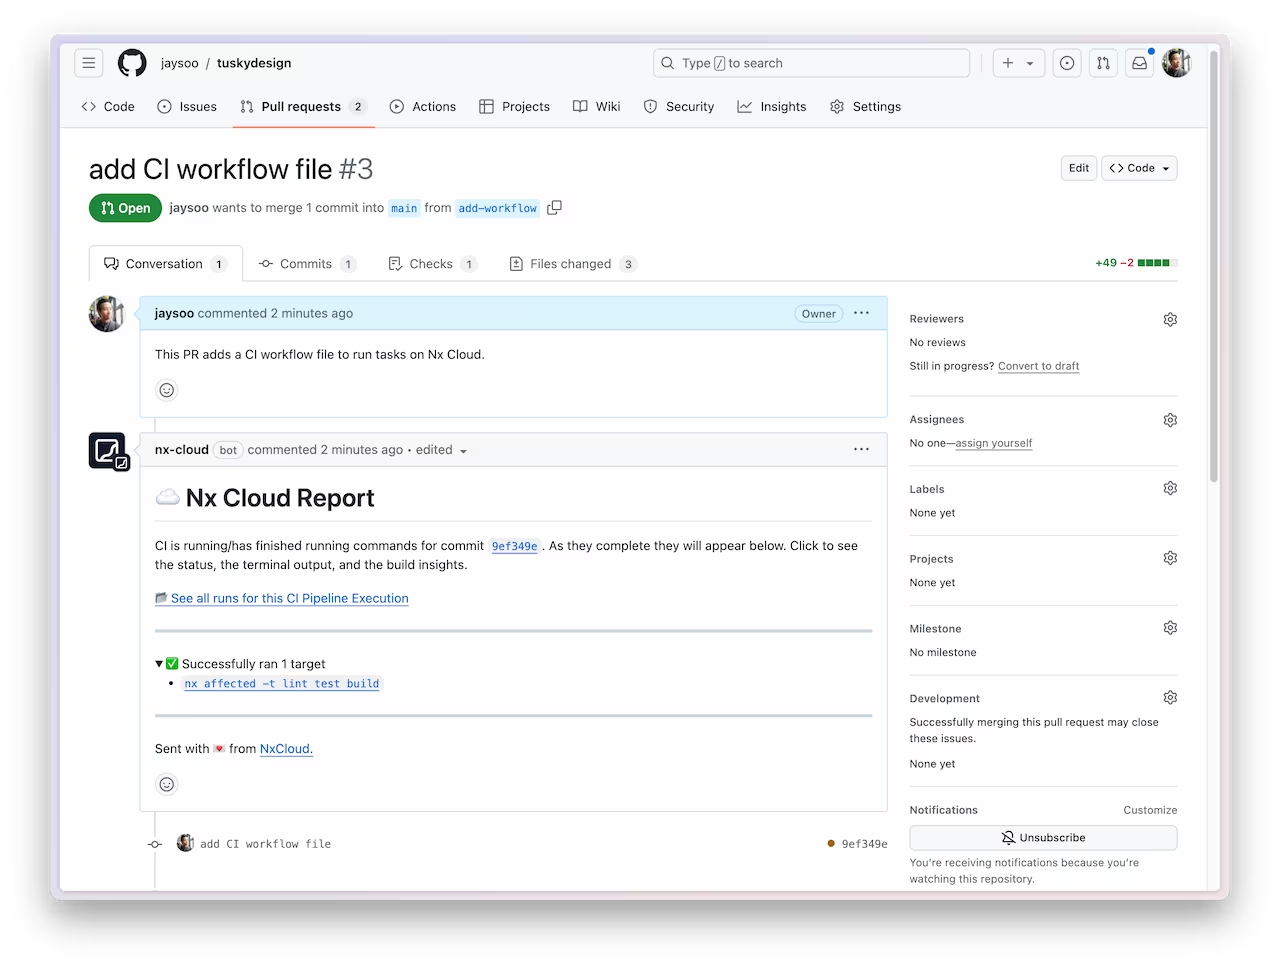
The See all runs link goes to a page with the progress and results of tasks that were run in the CI pipeline.
For more information about how Nx can improve your CI pipeline, check out one of these detailed tutorials:
Next Steps
Connect with the rest of the Nx community with these resources:
- Join the Official Nx Discord Server to ask questions and find out the latest news about Nx.
- Follow Nx on Twitter to stay up to date with Nx news
- Read our Nx blog
- Subscribe to our Youtube channel for demos and Nx insights